Tie Dyeing Pouches | Carcajou Tactical
Experimenting with tie dying pouches
HOW TO
10/16/2025
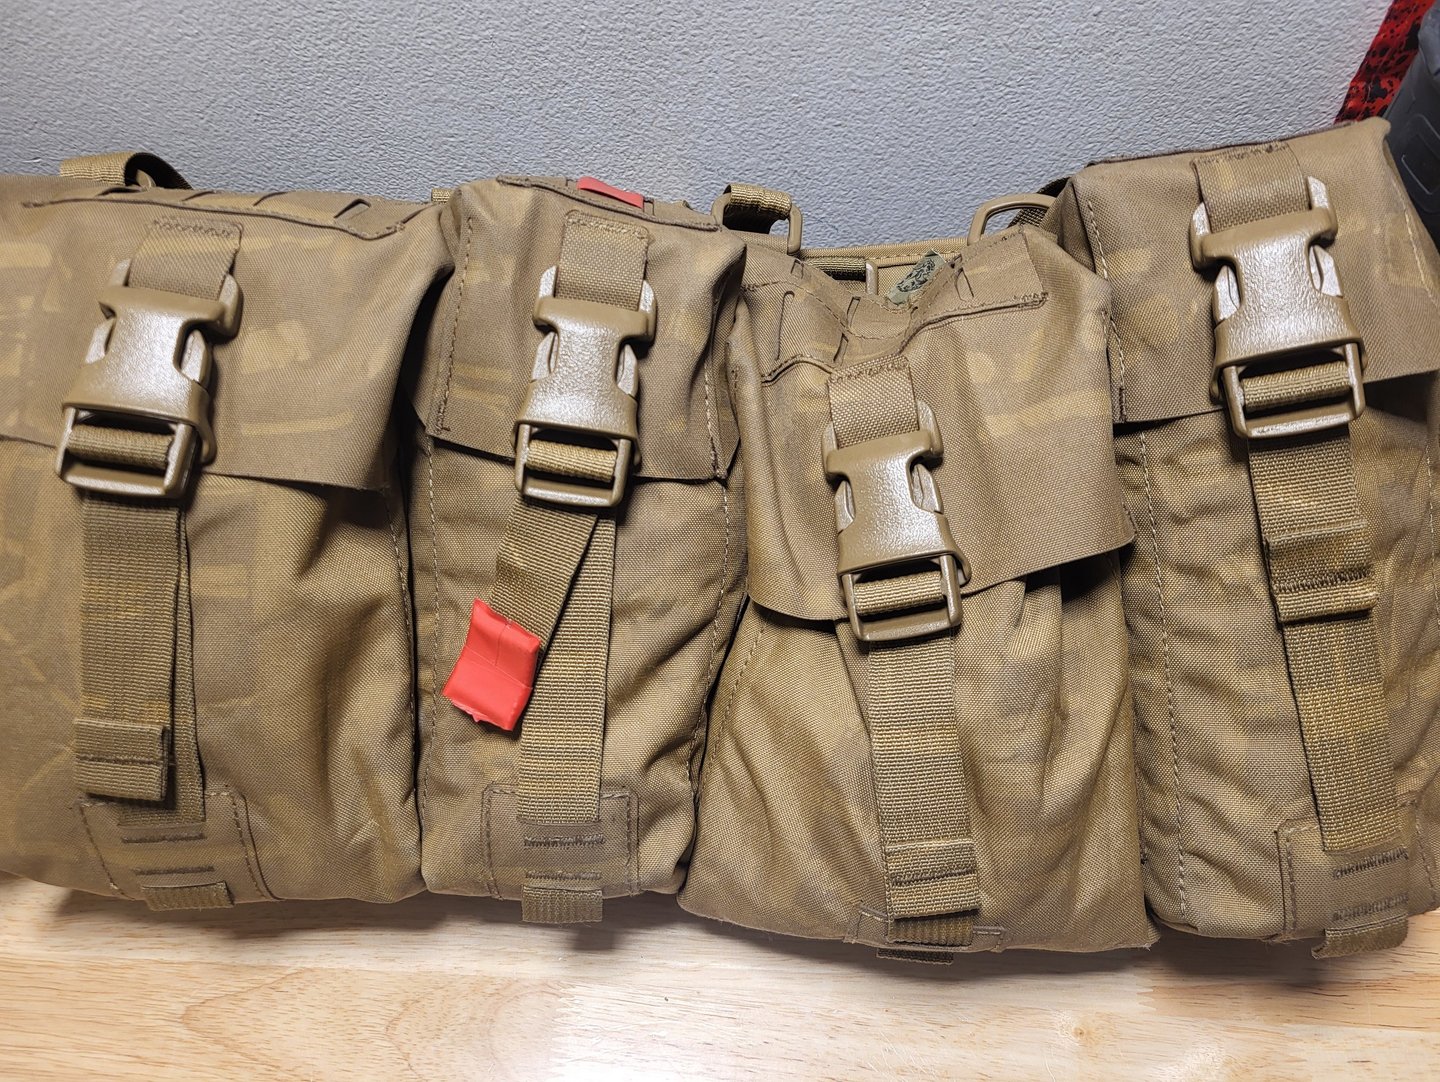
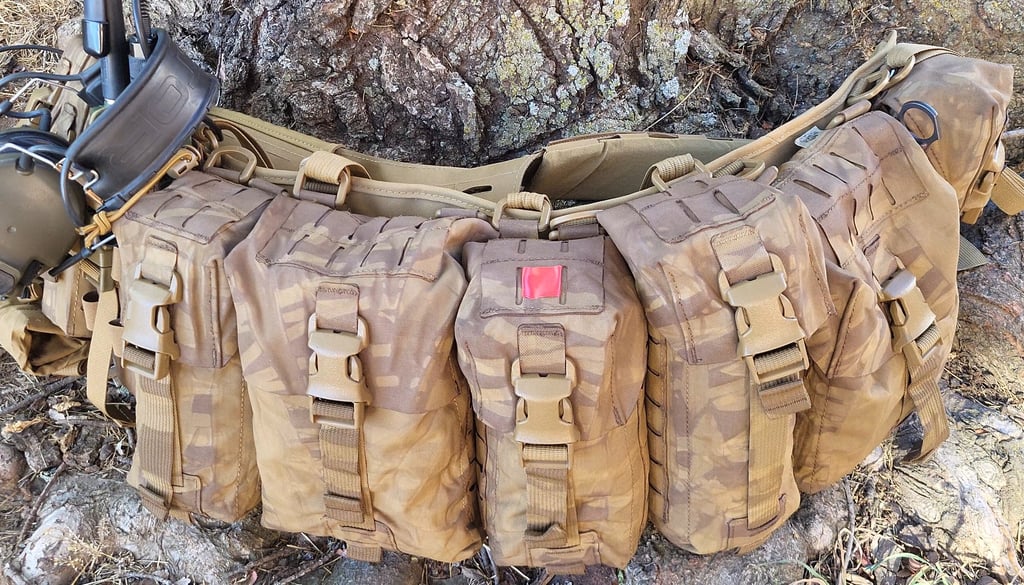
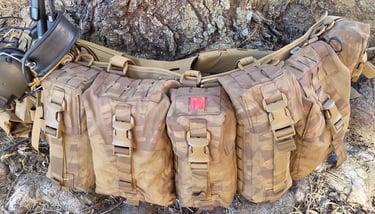
Alright, this was actually my 2nd attempt at this process. The first go at this project, the dye mixture was a bit too light & as a result looked like it just had a layer of dust on it, or something as seen in the picture above. And while the process worked, the overall color was still just a bit to light for my area & I decided to attempt another round of dying. In my head I was picturing a blend of the tiger stripe & the British Desert DPM patterns utilizing 3 different shades of brown, but as long as I can just soften the pop of the coyote, I think I'll be happy.
Far as I know there isn't really a guide when it comes to specifically tie dying pouches or other nylon equipment, but there's nothing really about them that would make this process any different than the tie dye shirts some of us made in grade school. Nothing except the materials in which the pouches are made up of that is. Unlike the cotton T-shirts, these pouches were made up of 500D Laminate which doesn't take up your standard dye nearly as well. Now there is dye mixture made up specifically for this kind of material which I was unaware of on my first attempt but did know prior to my 2nd. However, I decided to stick with the devil I already knew so to speak. Thanks to my prior attempt, I already had a good idea of how the mixture would affect the pouches & figured if nothing else, having a final product that was too light vs too dark would be ideal.
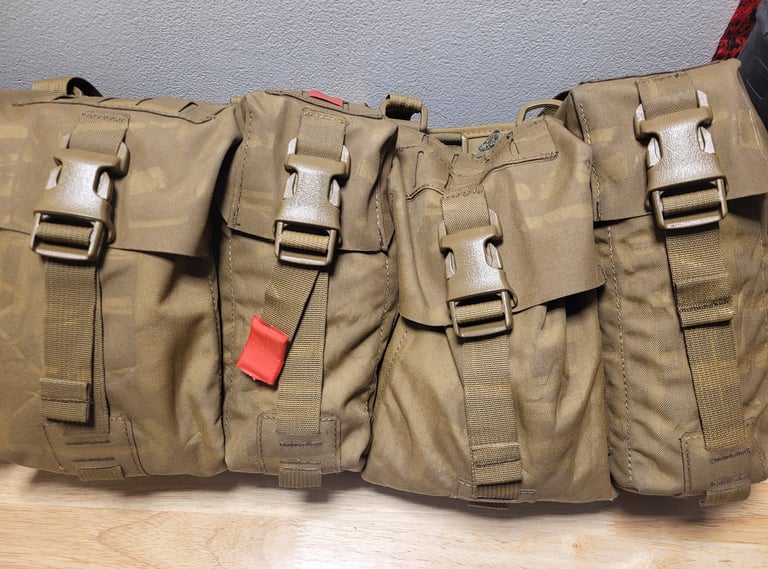
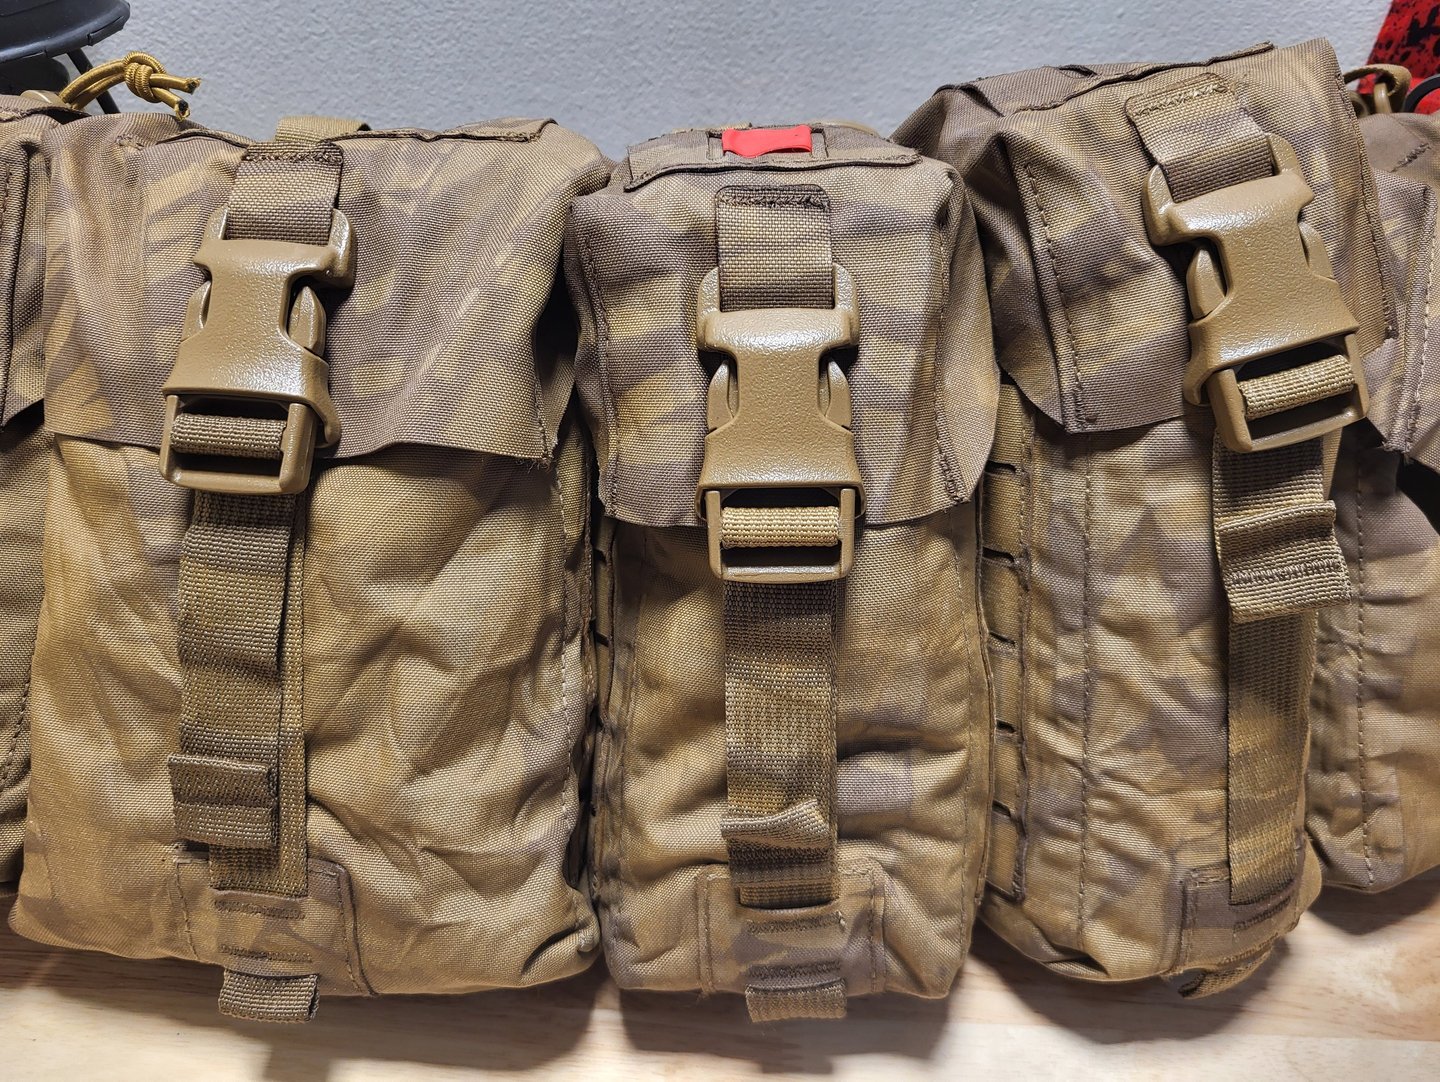
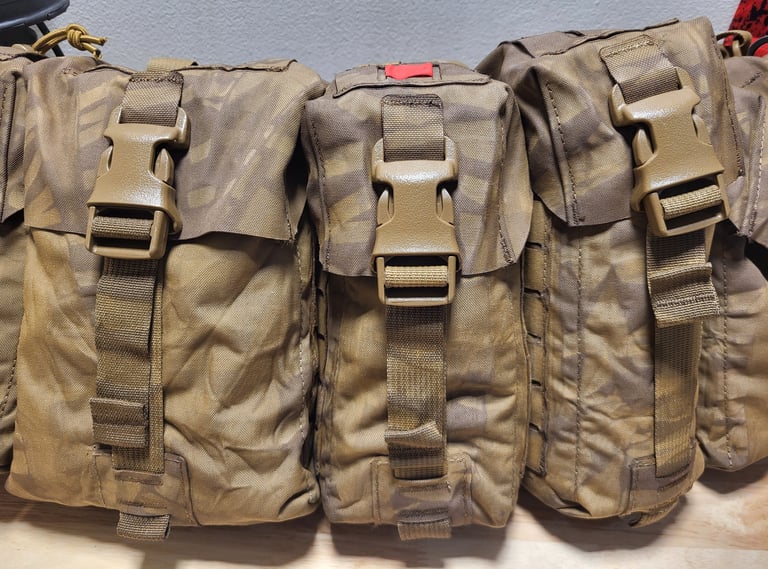
In the end I was able to achieve that 3 layers of colors on each pouch more or less. Thanks to the way I folded my pouches, the larger pouches ended up with a bit of a blank spot on the face of the body section. The darker tones are absolutely easier to see compared to my last attempt; however, they are not exactly how I pictured it in my head. All in all, I'm very happy with the end results & will probably leave them be. Coyote for my area was just a bit too bright so the fact that I was able to tone down that pop so to speak makes this process a success in my book.
Anyways, I apricate everyone taking the time to read this as always. If you interested, I recorded the process & will post a link to it.
https://youtu.be/a0wjkbcK_iA
Cheers
-G-
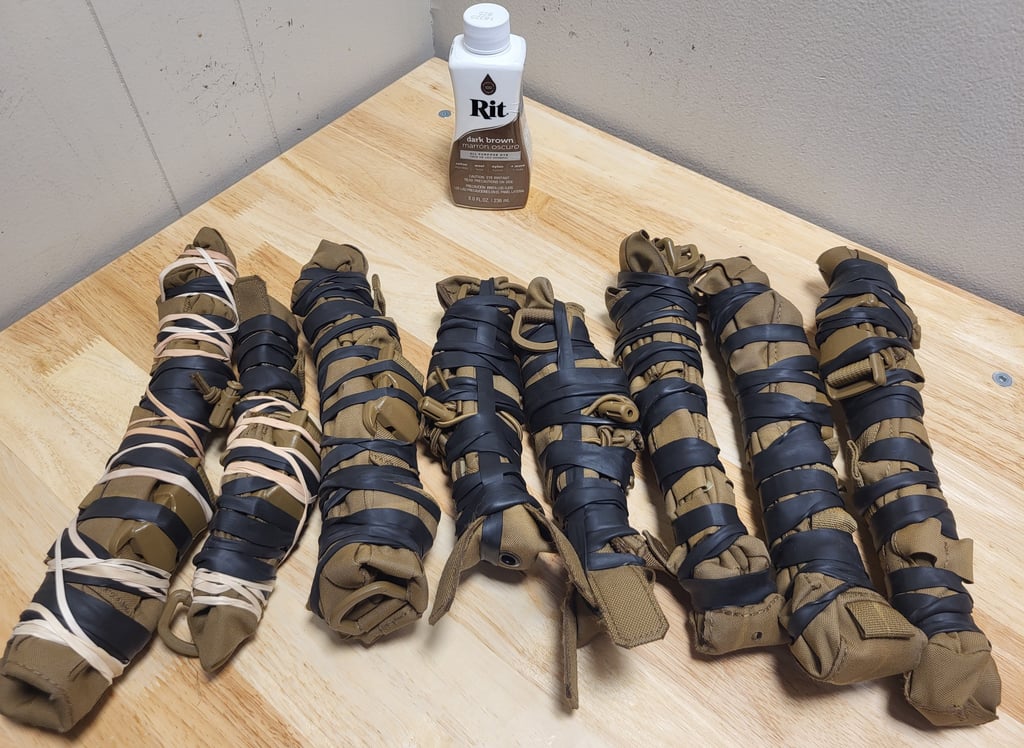
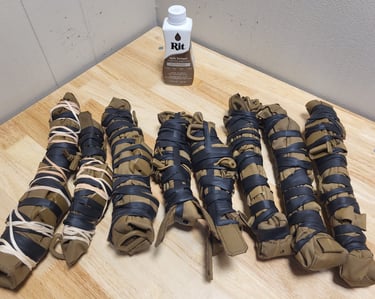
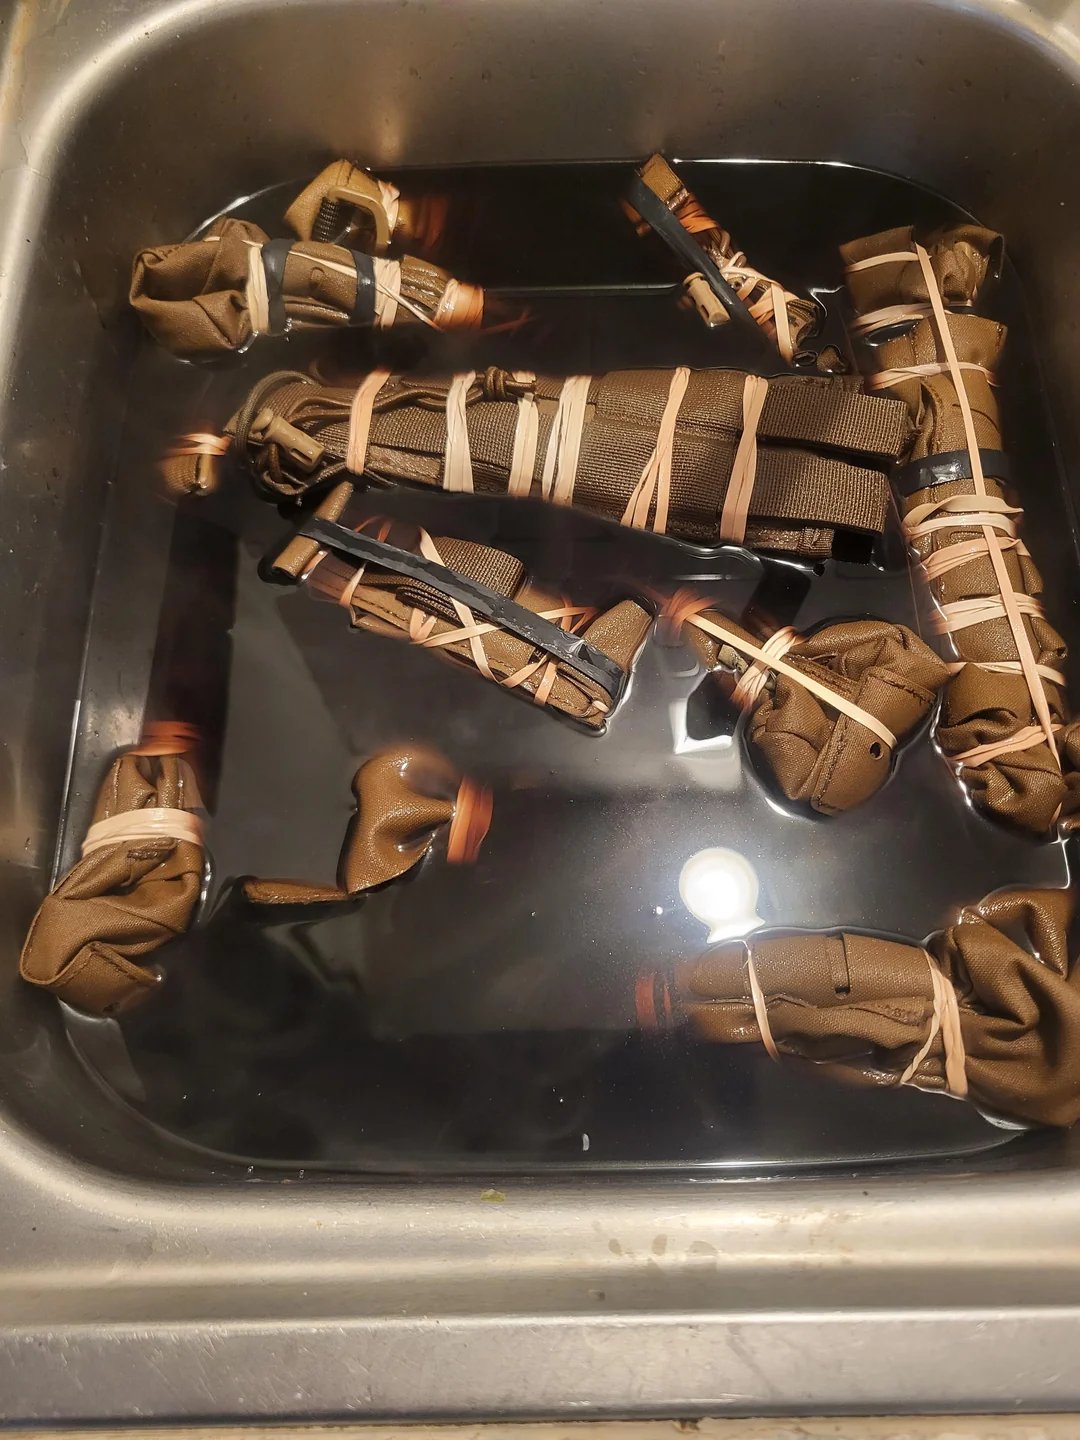
First step to this process is obviously going to be to apply the rubber bands to each pouch. Now there are 2 main things to keep in mind when you go about this process.
- How much of each pouch do you wish to dye?
- How you fold each pouch.
For myself I wanted to dye roughly 33% of each pouch meaning 2/3 of each pouch would need to be covered in rubber bands.
Far as folds go, thanks to the pressure our rubber bands will be applying to the pouch, how you fold the pouch can and will also affect the end pattern result. I took an approach where I folded the pouch in on the molle side creating the maximum amount of surface area for the face of the pouch then just scrunching it up from there.
Looking back on it now, this was & is largely an effective means to go about this process as long as the pouch isn't too wide. All the pouches that were 3+ wide columns of molle seemed to consistently have a blank spot in the middle of the pouch. Now to me this really isn't a big deal by any means, however if your really wanting to try and nail a specific pattern, I suggest you freshen up on your origami skills.
Similar to painting, the key here is prep work. Half assing this part will guarantee to bite you in the rear, if achieving that pattern is your end goal that is. If the bands are too loose or your folds are improper, you may not get the end results you're looking for. Once you get all your pouches bound up resembling that of something from a kinky magazine, the bulk of the work for this project is done.
Next will be mixing up your dye bath. I used RIT dye which has a complete how to guide listed on their website. Complete with ratios, temps & even a color mixing guide if you're trying to make a color not directly supported. That being said I just briefly glanced it over which probably had something to do with me not getting the results I had pictured in my head.
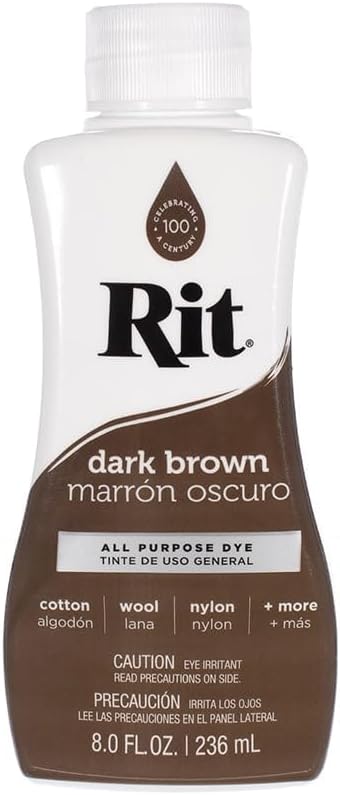

For me the process was fairly simple. Filled a large container full of water around 200 degrees, add a bit of soap & vinegar to it, then the dye. I used roughly 4-5 oz of Dark Brown Rit All Purpose Dye for about 5 gallons of water. Hindsight being what it is, this turned out to be a medium to low strength mixture. At least for this laminate material I was trying to dye.
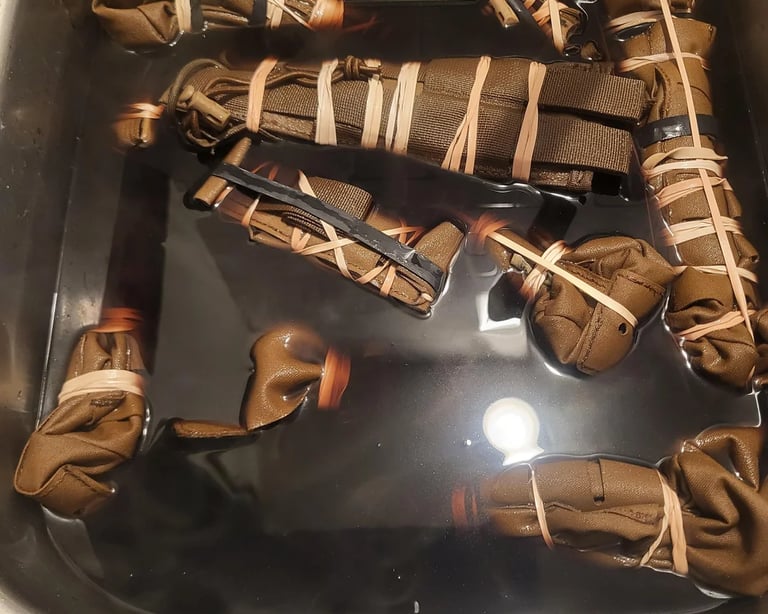
Once you have everything mixed up, the only thing left to do in submerge the pouches into the mixture. Again, from what I can recall from my loose read of the instructions, it calls for a 30-minute soak. Being sure to keep all items completely submerged & to stir up the mixture every few minutes.
I ended up doing about a 24 minute soak due to this being the pouches 2nd round of dying. Figuring if nothing else I could just do another repeat of the process if it was still to light.
Judging when to pull your pouches was the more challenging part, at least for me anyhow. The material fresh out of the bath is much darker than how they look when fully dry. Again, in my limited experience in this matter, the finial product ends up being about 70% lighter shade of whatever color your using, brown in this case. Once you do decide to pull the pouches, you need to make sure and give them a solid renicing before you lay them out to dry. I prefer to drop them straight into a soapy water bath for at least 5 minutes & then again in just plain water. I'm sure there are multiple reasons for this but the main one for me is to reduce the smell it leaves behind. The smell isn't extreme & does fade over time fairly quickly so it's nothing to put a ton of thought into, but I have a very sensitive nose, so this step is just quality of life. Last bit is just to dry the pouches out. Best way to do this is by hang drying them in a nice hot environment. Don't toss them into a dryer unless you want them highly damaged or destroyed.

Subscribe
© 2025. All rights reserved.
4 Love is patient, love is kind. It does not envy, it does not boast, it is not proud. 5 It does not dishonor others, it is not self-seeking, it is not easily angered, it keeps no record of wrongs. 6 Love does not delight in evil but rejoices with the truth. 7 It always protects, always trusts, always hopes, always perseveres.
8 Love never fails. But where there are prophecies, they will cease; where there are tongues, they will be stilled; where there is knowledge, it will pass away. 9 For we know in part and we prophesy in part, 10 but when completeness comes, what is in part disappears.
1 Corinthians 13: 4-10
Donate
VENMO
CASH APP
This website & all of its resources are & will always remain free to the public in efforts to raise the quality of our prepared citizens. However, if you believe in what we are doing here & want to contribute where you can, I thank you & will use it to put back into the community.
And maybe grab a beer once in a blue moon :)
SUBSCRIBE STAR